sawcollector
TreeHouser
I realize that this procedure is not for everyone but I see enough talk about it here and I want to show you that doing a pressure and vacuum test is doable without all the high dollar tools I have, and I guarantee you that learning how to do it will greatly improve your service skills. Even a major crankcase leak can be masked by diddling with the carb screws but the leak is still there and will get you sooner or later. When I am doing an evaluation on a saw it is just as important for me to know that the engine does not have a leak as it is for me to find one to fix. No leak means I can press on, yes leak means I need to find it and fix it.
I will use this MS 280 as an example, but it does not matter what the model or make, the procedure is the same.
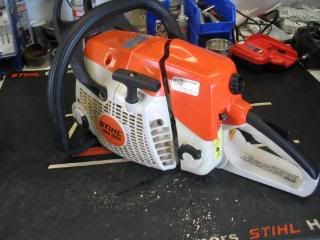
The first thing is to remove the carb.
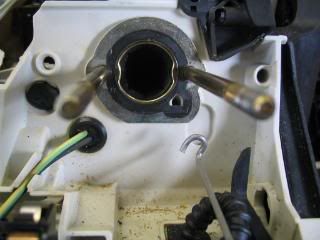
Notice that there is a hole about 4:00 by the intake which is the impulse port to drive the fuel pump. It must be blocked off as well as the intake port.
This is the first block off tool I made over 25 years ago:
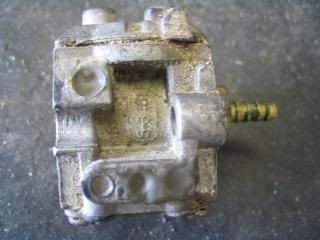

It is just an old carb, and I ran a tap down the throat to thread in the nipple and used JB Weld to epoxy up the rest of it. It is still air tight today. So you do not have to buy a bunch of special tools like these:
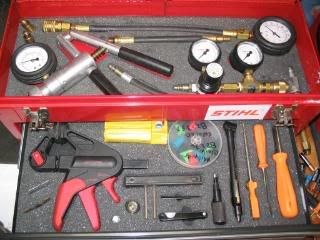
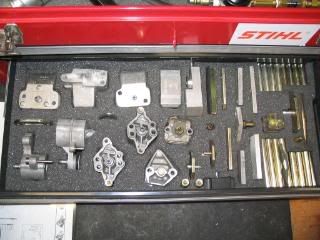
Yes I know, it looks pretty cool with the foam all cut out but I assure you this is the only tool box I have that I have ever got this done completely, the rest of my tool boxes just look like your box with everything piled in!
But this is my master test kit with every adapter I have ever accumulated all together, so it does make the job easier.
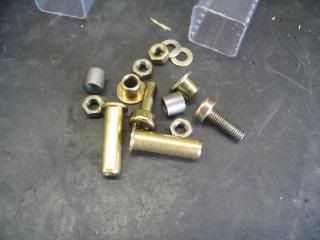
My home made adapter will not work on this MS 280 because of the impulse port off to the side so I will use the STIHL adapter to do the test. I keep a set of spacer sleeves and non-lock nuts handy to speed up the installation.
I do leave the spark plug in to seal the jug, and if it had a deco valve I would take it out and put a plug in place, as they always leak when doing this test, but don’t make a difference when it is running.
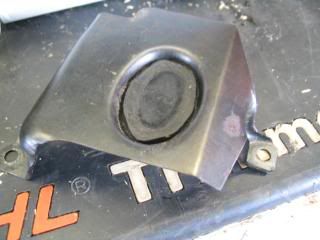
Now take off the muffler. I have a bunch of adapters for this but all you need is some thick rubber to pinch between the engine and the muffler. Sometimes it is hard to get in place just right, so I usually use a small plate to be sure the rubber is in position. For this saw I will just cut a little circle and use the spacer that goes between the muffler and cylinder to hold it in place.
Now I want to show you all the different pressure and vac tools there are, and one I made that is cheaper than any of them. This is the MightyVac combo pressure and vac tester, and it is OK but feels and looks cheap to me. But it does work and is less than $100.
This is the old STIHL pressure tester that uses a bulb like a blood pressure cuff, and works great, but is NLA.
This is the old STIHL vacuum pump, and again works great but was expensive, and is also NLA.
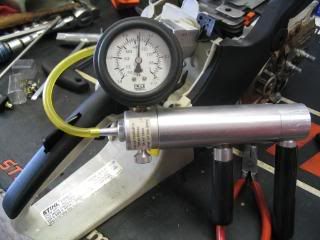
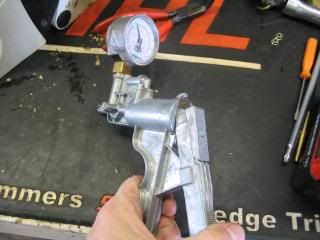
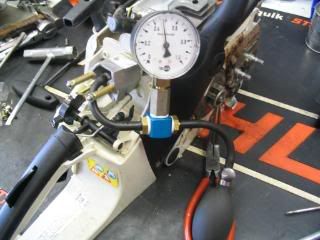
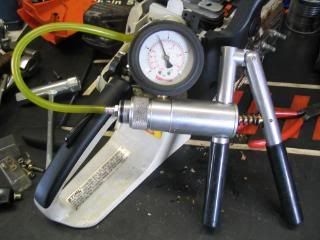
This is the current combo tester that will do pressure and vac, and I got this one from Power Probe, but it is now the official STIHL tester, and is around $140. I use it for testing carbs also.
Here it is showing pressure:
Here it is showing vacuum:

So with the old style testers you would pressure up the crankcase to no more than .5 bar, or about 8 PSI and it should hold steady.
STIHL says it can leak down slowly to no less than 5 PSI within 20 seconds and it is still OK. If it does leak I always try to find out where, even if it is a slow leak. I use soapy water in a squirt bottle, and in a worst case I even immersed the whole motor in a bucket of water. That one had a fine crack in the alloy case that no one else had been able to find.
Next pull a vacuum on the crankcase and see if that holds. Always gently rotate the crank in each direction to disturb the seal lips and verify that they hold under vacuum.
There is some argument about whether to do vac first and pressure second, or pressure first and vac second. The idea is that if you do pressure first you force the lips of the seals tighter to the crank, so they would hold under vacuum even if they were marginal. I have seen a saw with seals that only leak under vacuum and it will make you think the carb is messed up. So what I always do is turn the crank some, and if the seal is bad this will make it show up.
On the newer combo tester it is nice since you just push the knurled ring back and forth to switch between vac and pressure.
This is all it takes to verify if there is a problem or not. So adapter plates can be made from a piece of flat metal using the ex gasket as a template, and an old carb or two will work for many applications on the intake side.
Every now and then I would run into an engine that leaks so bad I can’t pump the tester fast enough to build any pressure to find the leak. So I built this rig to allow me to flow a steady 8 PSI through the engine and then I can roll it around and find the leak with my ear or the soapy water. I also have a vac source with it so it will do the complete job.
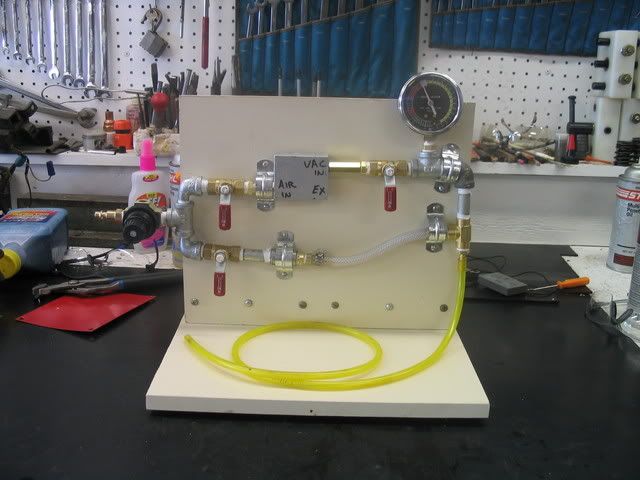
The gauge is an old pressure/vacuum type for when cars had carbs and mechanical fuel pumps, but I found a double acting gauge at Toolsource.com for $8 so that would work as well. The most expensive thing is the regulator. The little silver box is an air driven vac generator, and I got it from Harbor Freight in a cheap metal box as a vac pump to use on your AC in the car. I took it apart and tossed the box and just mounted the plastic block to the panel to create the vac. So you hook the hose to the engine, open the bottom pressure valve, slowly turn in the regulator till you have about 8 PSI on the gauge then close the valve and it should hold. If it does no leaks, if it leaks leave the valve open and find the leak with the soapy water. For vac leave the pressure valve closed, open both of the top valves and pull the vacuum by dialing in the regulator, then close the right hand valve and the then the left hand one to stop all the noise of the air rushing out of the exhaust of the vac generator, and rotate the crank and see if the vac holds. With this on the bench I use it more than the hand pump testers since it is easier to use. I also use this to pressure test a fuel tank to be sure there are no leaks, then do a vac test on the tank to be sure the vent is opening.
I also use it as a vac source to pull fuel out of a tank if I want to save the fuel, and I have another tank for bar oil for the saws.
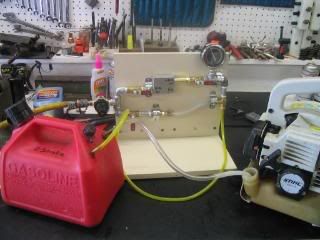
Makes putting the units away a lot easier and less messy than trying to pour them out in a funnel, along with all the other debris that falls into the funnel from the saw. I probably have about $75 invested in this device.
I hope this helps you understand what a pressure vac test is about and that it can be done without big bucks.
Eddie
I will use this MS 280 as an example, but it does not matter what the model or make, the procedure is the same.
The first thing is to remove the carb.
Notice that there is a hole about 4:00 by the intake which is the impulse port to drive the fuel pump. It must be blocked off as well as the intake port.
This is the first block off tool I made over 25 years ago:
It is just an old carb, and I ran a tap down the throat to thread in the nipple and used JB Weld to epoxy up the rest of it. It is still air tight today. So you do not have to buy a bunch of special tools like these:
Yes I know, it looks pretty cool with the foam all cut out but I assure you this is the only tool box I have that I have ever got this done completely, the rest of my tool boxes just look like your box with everything piled in!
But this is my master test kit with every adapter I have ever accumulated all together, so it does make the job easier.
My home made adapter will not work on this MS 280 because of the impulse port off to the side so I will use the STIHL adapter to do the test. I keep a set of spacer sleeves and non-lock nuts handy to speed up the installation.
I do leave the spark plug in to seal the jug, and if it had a deco valve I would take it out and put a plug in place, as they always leak when doing this test, but don’t make a difference when it is running.
Now take off the muffler. I have a bunch of adapters for this but all you need is some thick rubber to pinch between the engine and the muffler. Sometimes it is hard to get in place just right, so I usually use a small plate to be sure the rubber is in position. For this saw I will just cut a little circle and use the spacer that goes between the muffler and cylinder to hold it in place.
Now I want to show you all the different pressure and vac tools there are, and one I made that is cheaper than any of them. This is the MightyVac combo pressure and vac tester, and it is OK but feels and looks cheap to me. But it does work and is less than $100.
This is the old STIHL pressure tester that uses a bulb like a blood pressure cuff, and works great, but is NLA.
This is the old STIHL vacuum pump, and again works great but was expensive, and is also NLA.
This is the current combo tester that will do pressure and vac, and I got this one from Power Probe, but it is now the official STIHL tester, and is around $140. I use it for testing carbs also.
Here it is showing pressure:
Here it is showing vacuum:
So with the old style testers you would pressure up the crankcase to no more than .5 bar, or about 8 PSI and it should hold steady.
STIHL says it can leak down slowly to no less than 5 PSI within 20 seconds and it is still OK. If it does leak I always try to find out where, even if it is a slow leak. I use soapy water in a squirt bottle, and in a worst case I even immersed the whole motor in a bucket of water. That one had a fine crack in the alloy case that no one else had been able to find.
Next pull a vacuum on the crankcase and see if that holds. Always gently rotate the crank in each direction to disturb the seal lips and verify that they hold under vacuum.
There is some argument about whether to do vac first and pressure second, or pressure first and vac second. The idea is that if you do pressure first you force the lips of the seals tighter to the crank, so they would hold under vacuum even if they were marginal. I have seen a saw with seals that only leak under vacuum and it will make you think the carb is messed up. So what I always do is turn the crank some, and if the seal is bad this will make it show up.
On the newer combo tester it is nice since you just push the knurled ring back and forth to switch between vac and pressure.
This is all it takes to verify if there is a problem or not. So adapter plates can be made from a piece of flat metal using the ex gasket as a template, and an old carb or two will work for many applications on the intake side.
Every now and then I would run into an engine that leaks so bad I can’t pump the tester fast enough to build any pressure to find the leak. So I built this rig to allow me to flow a steady 8 PSI through the engine and then I can roll it around and find the leak with my ear or the soapy water. I also have a vac source with it so it will do the complete job.
The gauge is an old pressure/vacuum type for when cars had carbs and mechanical fuel pumps, but I found a double acting gauge at Toolsource.com for $8 so that would work as well. The most expensive thing is the regulator. The little silver box is an air driven vac generator, and I got it from Harbor Freight in a cheap metal box as a vac pump to use on your AC in the car. I took it apart and tossed the box and just mounted the plastic block to the panel to create the vac. So you hook the hose to the engine, open the bottom pressure valve, slowly turn in the regulator till you have about 8 PSI on the gauge then close the valve and it should hold. If it does no leaks, if it leaks leave the valve open and find the leak with the soapy water. For vac leave the pressure valve closed, open both of the top valves and pull the vacuum by dialing in the regulator, then close the right hand valve and the then the left hand one to stop all the noise of the air rushing out of the exhaust of the vac generator, and rotate the crank and see if the vac holds. With this on the bench I use it more than the hand pump testers since it is easier to use. I also use this to pressure test a fuel tank to be sure there are no leaks, then do a vac test on the tank to be sure the vent is opening.
I also use it as a vac source to pull fuel out of a tank if I want to save the fuel, and I have another tank for bar oil for the saws.
Makes putting the units away a lot easier and less messy than trying to pour them out in a funnel, along with all the other debris that falls into the funnel from the saw. I probably have about $75 invested in this device.
I hope this helps you understand what a pressure vac test is about and that it can be done without big bucks.
Eddie
